• How to Boost Natural Light in Your Home

    How to Boost Natural Light in Your Home,Kenneth Jamaca

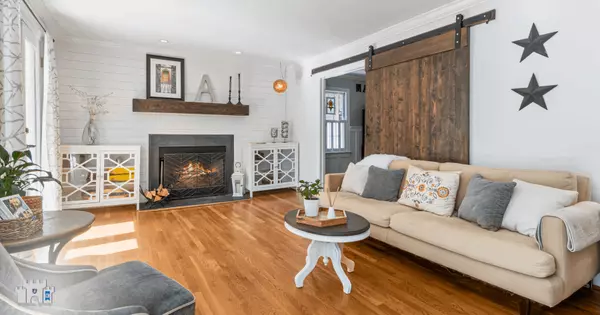
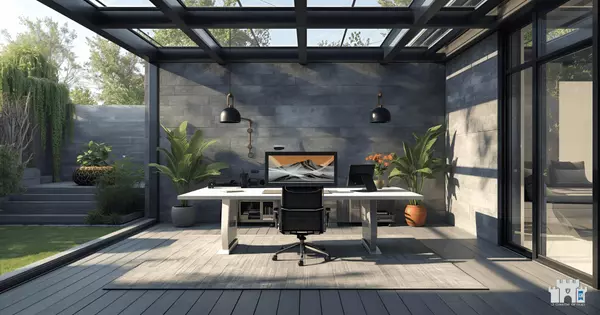
    Natural light is not only a desirable feature in homes but also offers benefits like improved mood, lower energy costs, and a more welcoming atmosphere. To maximize natural light, start by assessing your windows. Cleaning windows inside and out can immediately brighten your space. Replace heavy curtains with sheer or light-colored options that allow sunlight to pass through. If privacy is a concern, consider frosted glass or window films that let in light while maintaining discretion.Mirrors are a simple yet effective way to enhance natural light. Place large mirrors opposite windows to reflect sunlight deeper into the room. Mirrored furniture or decorative pieces can also contribute to this effect, creating a sense of openness and brightness. For darker rooms, painting walls in light, neutral colors can make a significant difference. White or pastel shades reflect more light compared to darker tones, making the space feel larger and more airy.Furniture placement plays a role in optimizing light flow. Avoid blocking windows with large pieces of furniture, and opt for low-profile designs that don’t obstruct the view. Glass or acrylic furniture allows light to pass through, maintaining an unobstructed pathway for sunlight. If you’re renovating, consider installing skylights or solar tubes in areas with limited access to windows. These additions bring natural light into previously dim spaces.Landscaping outside your home can also impact indoor lighting. Trim overgrown trees or shrubs that block sunlight from entering windows. Additionally, choosing reflective surfaces for exterior elements like patios or driveways can help bounce light into your home. Incorporating these strategies not only enhances your home’s aesthetic but also makes it more energy-efficient and inviting.

    Read More
  • Creating a Low-Maintenance Home Garden

    Creating a Low-Maintenance Home Garden,Kenneth Jamaca

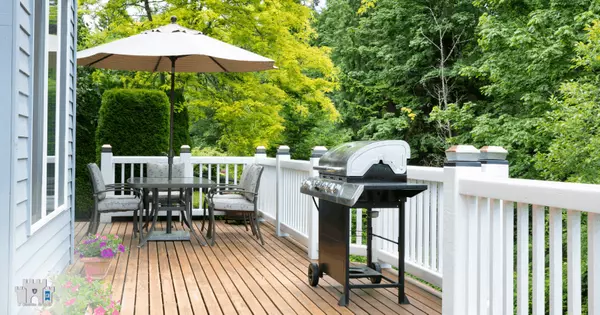
    Designing a low-maintenance home garden can provide a beautiful outdoor space without the demands of constant upkeep. To start, choose plants that thrive in your local climate. Native plants are particularly well-suited for this purpose, as they require less water and care due to their natural adaptation to the environment. Perennials are another excellent option because they return year after year, eliminating the need for replanting. Researching the types of plants that work best for your region can save you time and effort in the long run. Grouping plants with similar sunlight, soil, and watering requirements is another key strategy for reducing maintenance. This allows you to care for them more efficiently, as you won’t need to adjust your routine for individual plants. Adding mulch to your garden beds is also beneficial. Mulch not only helps retain soil moisture but also reduces weed growth, keeping your garden looking tidy with less effort. Over time, the organic matter in mulch can improve soil health, further supporting your plants. Hardscaping elements like pathways, patios, and raised beds can complement a low-maintenance garden. Gravel paths or stone walkways eliminate the need for mowing and create a polished look. Raised garden beds make planting and weeding more accessible while improving drainage and reducing soil compaction. These features add structure to your garden, making it both functional and aesthetically pleasing with minimal care. Watering is one of the most time-consuming aspects of gardening, so installing an efficient system can make a big difference. Drip irrigation systems deliver water directly to the roots of your plants, reducing waste and ensuring they receive consistent hydration. Adding a timer to your system automates the process, so you don’t need to worry about watering even when you’re away. This approach not only saves water but also ensures healthier plants. And the last one would be - set aside a small amount of time each week for routine garden maintenance. Regularly removing weeds, deadheading flowers, and checking your irrigation system can keep your garden in great shape without feeling overwhelming. A low-maintenance garden offers the benefits of outdoor beauty and relaxation while freeing up your time for other activities. With thoughtful planning, you can enjoy a thriving garden that requires only minimal effort to maintain.        

    Read More
  • Balancing Style and Functionality in Your Home Design

    Balancing Style and Functionality in Your Home Design,Kenneth Jamaca

    Creating a home that feels personal and welcoming is about more than just design trends. It’s an opportunity to craft an environment that resonates with your unique preferences and lifestyle. Whether you’re starting fresh or looking to refresh your current space, here are practical tips to help you design a home that feels truly yours.   1. Define Your Style Before diving into decor, take time to identify your personal style. Do you lean toward a minimalist, modern approach, or are you drawn to classic and traditional designs? Maybe your preferences lie in a mix of styles. Use this as a foundation to guide decisions on colors, furniture, and decorative elements. Knowing your style ensures that your home feels cohesive and authentic.   2. Make Functionality a Priority While a beautiful space is appealing, a functional one is essential. Arrange furniture to create clear pathways and ensure easy movement through rooms. Consider multi-purpose furniture, such as a storage ottoman or a convertible sofa, to make the most of your space. Functionality ensures your home is not just attractive but also practical for daily living.   3. Use Lighting to Set the Mood Lighting plays a significant role in shaping the atmosphere of your home. Aim for a mix of natural light and strategically placed fixtures. Overhead lights can provide general illumination, while floor lamps, wall sconces, or table lamps add layers of warmth. Consider task lighting in workspaces, such as the kitchen or home office, and use accent lighting to highlight artwork or architectural features.   4. Add Personal Elements Incorporate personal items that tell your story. Display meaningful artwork, photographs, or mementos that reflect your life and experiences. These touches make a house feel like a home. Strike a balance between showcasing personal pieces and maintaining an uncluttered look, ensuring visitors feel welcome in the space.   5. Stay Mindful of Trends Trends in interior design can be inspiring, but it’s wise to approach them with a critical eye. Incorporate elements of current styles that align with your preferences, but focus on timeless designs that won’t feel dated quickly. A neutral sofa with trendy throw pillows, for example, can strike a balance between classic and contemporary.   6. Practical Tips for Harmonious Design   Choose a Color Palette: Select a few complementary colors and stick to them throughout your home to create a sense of unity. Play with Texture: Layer textures like wood, metal, and fabric to add visual interest and depth. Create Focal Points: Highlight a standout piece of furniture, artwork, or a feature wall in each room. Keep It Organized: A clutter-free environment not only looks better but also promotes relaxation.     Designing your home is a process that combines practicality with creativity. By focusing on your personal style, prioritizing functionality, and incorporating meaningful touches, you can create a space that feels both beautiful and uniquely yours. Remember, your home should work for you—every choice should reflect your needs, preferences, and personality.    

    Read More
  • The Importance of Seasonal Home Maintenance

    The Importance of Seasonal Home Maintenance,Kenneth Jamaca

    A home maintenance calendar is a simple tool that helps homeowners stay on top of essential tasks. Regular upkeep prevents small problems from becoming costly repairs and keeps your home inexcellent condition.Why Create a Maintenance Calendar? Many homeowners overlook maintenance tasks until issues arise. A calendar provides a clear schedule for tasks throughout the year, ensuring nothing is forgotten.What to Include   Monthly Tasks: Check HVAC filters, inspect plumbing for leaks, and test smoke detectors. Seasonal Tasks: Clean gutters in spring and fall, service the air conditioner in summer, and winterize your home in late autumn. Annual Tasks: Schedule a roof inspection, service major appliances, and check for signs of pests.   How to Get Started   List all the maintenance tasks your home requires and assign them to specific months or seasons. Digital tools or apps can help you set reminders, ensuring you never miss a task.A home maintenance calendar simplifies the process of caring for your property, helping you save time, money, and effort in the long run.    

    Read More
  • Prevent Costly Repairs with Regular Home Maintenance

    Prevent Costly Repairs with Regular Home Maintenance,Kenneth Jamaca

    Home maintenance is essential for preserving the condition and value of your property. A little attention throughout the year can prevent costly repairs down the line. One of the first things to do is create a seasonal checklist to ensure no task is overlooked. Start with your HVAC system. Whether it’s your heating or air conditioning, having your system serviced once a year can keep it running efficiently. Change the filters regularly, especially if you have pets or allergies, as clean filters improve indoor air quality. Next, focus on the exterior of your home. Regularly inspect the roof for any missing or damaged shingles, which can lead to leaks if not repaired. Clean the gutters every few months to prevent water damage from clogged drainage systems. If you live in an area with harsh winters, consider removing snow from the roof and pathways to avoid ice buildup. Inside the house, check for plumbing issues. Inspect under sinks for leaks, and examine walls for water damage, which could indicate a plumbing issue. Test your smoke detectors and carbon monoxide alarms, replacing the batteries when necessary. It’s also a good idea to check the batteries in your thermostat to ensure your heating and cooling systems are running properly. Don’t forget about your appliances. Clean your dryer vent to reduce the risk of a fire, and check your refrigerator’s coils for dust, which can reduce efficiency. Additionally, examine your home’s foundation for any cracks that might let in moisture, which can cause long-term damage. By maintaining your home regularly, you’ll keep it comfortable and avoid surprise expenses that could arise from deferred repairs.    

    Read More
  • How to Make Small Spaces Look Bigger

    How to Make Small Spaces Look Bigger,Kenneth Jamaca

    Living in a small space doesn’t have to feel cramped. With the right techniques, you can create the illusion of more room and make your home feel open and inviting: 1. Go for a Light Color Scheme
Lighter paint colors make spaces feel airy and open, so stick to shades like white, pale gray, or soft beige. Bright ceilings and trims also contribute to a feeling of spaciousness. 2. Select Multi-Functional Furniture
Opt for pieces that serve dual purposes, like a coffee table with storage or a sofa bed for guests. This reduces the need for extra items and helps keep the area clutter-free. 3. Incorporate Mirrors
Mirrors are a tried-and-true trick for making rooms look larger. A large mirror can reflect light and open up the space, while multiple mirrors in a room can make it appear much larger. 4. Embrace Minimalist Decor
Avoid overcrowding the space with decor items. Choose a few key pieces that you love and keep surfaces clear, which helps prevent a room from feeling too busy. 5. Use Light Fabrics and Sheer Curtains
Heavy fabrics can weigh down a small room, while lighter, sheer materials make it feel more open. Curtains should be hung close to the ceiling to give the illusion of height. 6. Think Vertically
Vertical storage solutions, like tall shelves or high cabinets, draw the eye upward, giving the impression of more space. Floating shelves keep the floor area open and create a streamlined look. 7. Avoid Dark Colors in Large Quantities
While darker shades can add warmth and coziness, using them sparingly in small spaces is key. If you love darker hues, consider adding them as accents or in accessories. 8. Invest in a Large Area Rug
A larger rug in a small room can actually make the space feel more expansive, as it creates a single, unified space for your furniture. 9. Make Use of Natural Light
Embrace any natural light by keeping windows clear and free of heavy treatments. Open up shades during the day to let light in, instantly making the room appear larger. 10. Choose Low-Profile Furniture
Low-profile furniture takes up less visual space and keeps the sightline open, which can make a room feel much larger. Mid-century modern designs are particularly well-suited to small spaces. By implementing these strategies, you can maximize every square inch and make your small space feel stylish, comfortable, and much bigger.  

    Read More
  • How to Design a Home Office That Inspires Productivity

    How to Design a Home Office That Inspires Productivity,Kenneth Jamaca

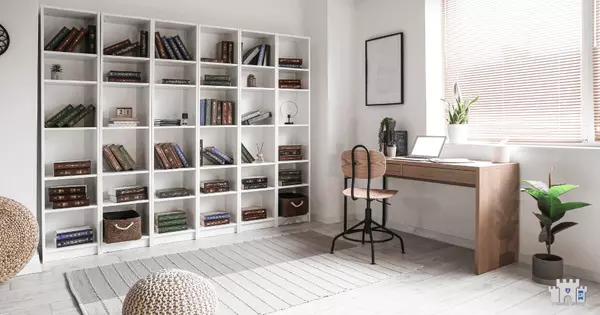
    As more people work from home, creating a productive home office space has become essential. Whether you’re working full-time remotely or just need a spot to get tasks done, these tips will help you design an office space that enhances focus and productivity. Choose the Right Location: Pick a quiet area with minimal distractions. If possible, set up your office in a separate room to create a clear division between work and home life. Invest in a Comfortable Chair: Comfort is key to staying productive. A good ergonomic chair can make a big difference in preventing back pain and improving focus. Optimize Lighting: Natural light boosts mood and productivity, so set up near a window if possible. If not, invest in good desk lighting to reduce eye strain. Organize Your Space: Keep your office tidy by investing in storage solutions like shelves, filing cabinets, and drawer organizers. Clutter can be a distraction. Personalize Your Office: While functionality is important, adding personal touches such as plants, art, or décor can make your office feel more inviting and motivating. Use Noise-Canceling Solutions: If your home environment is noisy, consider noise-canceling headphones or adding soundproofing materials like rugs or curtains to keep distractions to a minimum. Manage Cables and Technology: Keep your desk organized by managing cables with clips or a cable management system. Make sure your office has adequate outlets for all your devices. Add a Whiteboard or Bulletin Board: Having a space to jot down notes, to-do lists, or reminders helps keep you organized and focused on priorities. Consider Your Work Style: If you prefer standing over sitting, consider getting an adjustable standing desk to switch up your work position during the day. Keep it Clean: A clean workspace leads to a clearer mind. Schedule time to clean and declutter your office regularly for maximum productivity. By setting up your home office thoughtfully, you can create a productive and comfortable space to thrive while working from home.  

    Read More
  • Step-by-Step Tips for a Flawless Interior Paint Job

    Step-by-Step Tips for a Flawless Interior Paint Job,Kenneth Jamaca

    Painting your home’s interior is one of the most cost-effective ways to refresh and update your space. Whether you're aiming for a complete overhaul or just looking to touch up a few rooms, proper planning and execution are key to achieving a professional-looking result. Here’s a comprehensive guide to help you through every step of the interior painting process. 1. Choose the Right Paint Selecting the right paint is crucial for a successful project. Consider the following factors: Finish: Paint finishes range from matte to glossy. Matte or eggshell finishes are great for walls with imperfections as they help hide flaws, while semi-gloss and gloss finishes are ideal for high-traffic areas and trim work due to their durability and ease of cleaning. Color: Choose colors that complement your existing décor and create the atmosphere you want. Light colors can make a room feel larger and more open, while darker colors can add warmth and coziness. Test samples on your walls to see how they look in different lighting conditions before making a final decision. Quality: Invest in high-quality paint for better coverage, durability, and finish. High-quality paints often have better pigments and fewer impurities, leading to a more vibrant and long-lasting result. 2. Gather Your Supplies Before you start painting, make sure you have all the necessary supplies: Paint: Buy enough paint to cover the entire area. It’s better to have a little extra in case touch-ups are needed. Primer: Primer helps to cover stains and provides a good surface for the paint to adhere to. It’s especially important if you’re painting over a darker color or a surface with imperfections. Brushes and Rollers: Use high-quality brushes for cutting in and detailing, and rollers for large wall areas. Choose the appropriate roller nap length based on the texture of your walls. Painter’s Tape: Tape off edges and trim to ensure clean lines and prevent paint from bleeding onto adjacent surfaces. Drop Cloths: Protect your floors and furniture from paint spills and splatters with drop cloths or old sheets. Paint Tray: A paint tray helps you manage and evenly distribute paint on your roller. 3. Prepare the Room Preparation is key to a smooth painting process: Clear the Room: Remove furniture, wall decorations, and fixtures from the room. If it’s not possible to remove everything, cover items with drop cloths. Clean the Walls: Dust and dirt can prevent paint from adhering properly. Clean the walls with a mild detergent and water, and allow them to dry completely before painting. Repair Imperfections: Fill any holes or cracks with spackle or joint compound. Sand the patched areas smooth once they’re dry. Tape Off Areas: Use painter’s tape to mask off areas you don’t want to paint, such as trim, baseboards, and ceilings. Press the tape down firmly to prevent paint from seeping underneath. 4. Apply Primer Applying primer is particularly important if you’re painting over a dark color, a stained surface, or raw drywall. Primer provides a uniform surface for the paint and can help achieve better coverage with fewer coats. Apply primer using a brush for edges and a roller for larger areas, and allow it to dry according to the manufacturer’s instructions. 5. Start Painting Begin the painting process with these steps: Cut In: Use a brush to “cut in” around edges, corners, and areas near tape. This technique involves painting the edges of the wall before rolling on the main sections. It ensures clean lines and a more professional finish. Roll the Walls: Load your roller with paint and start rolling from the top of the wall down. Use a “W” or “M” pattern to evenly distribute the paint and avoid roller marks. Work in small sections to keep a wet edge and prevent visible lines. Apply Additional Coats: Most walls will require at least two coats of paint. Allow the first coat to dry completely before applying the second coat. If the paint looks uneven or the color isn’t fully covered, a third coat may be necessary. 6. Remove Painter’s Tape Once the final coat of paint is dry, carefully remove the painter’s tape. Pull the tape off slowly and at a 45-degree angle to avoid peeling off any paint. If you notice any small areas where the paint bled, touch them up with a small brush. 7. Clean Up Proper cleanup is essential for maintaining your painting tools and space: Wash Brushes and Rollers: Clean brushes and rollers immediately after use according to the type of paint used (water-based or oil-based). For water-based paints, use soap and water. For oil-based paints, use mineral spirits or paint thinner. Dispose of Leftover Paint: Store leftover paint properly for future touch-ups or dispose of it according to local regulations. Many communities have special disposal programs for paint. Remove Drop Cloths: Carefully remove drop cloths from floors and furniture. Dispose of or clean any paint spills immediately. 8. Inspect and Touch Up After the paint has dried, inspect your walls for any missed spots or imperfections. Touch up any areas as needed to achieve a flawless finish. Ensure that the paint has fully cured before moving furniture back into the room or hanging any artwork. 9. Maintain Your Painted Walls To keep your newly painted walls looking fresh, avoid using harsh cleaners and opt for mild soap and water for regular cleaning. If you notice scuffs or stains, address them promptly to prevent them from setting in. By following these detailed tips, you’ll be able to achieve a professional-looking paint job that enhances the beauty and value of your home. Whether you’re tackling one room or your entire house, proper preparation, technique, and finishing will ensure your painting project is a success.  

    Read More
  • The True Value of Homeownership

    The True Value of Homeownership,Kenneth Jamaca

    Buying and owning your home can make a big difference in your life by bringing you joy and a sense of belonging. And with National Homeownership Month just passed us, it’s the perfect time to think about all the benefits homeownership provides.Of course, there are financial reasons to buy a house, but it’s important to consider the non-financial benefits that make a home more than just where you live.Here are three ways owning your home can give you a sense of accomplishment, happiness, and pride:You May Feel Happier and More FulfilledOwning a home is associated with better mental health and well-being. Studies have shown the emotional and psychological benefits that homeownership has on a person’s health and self-esteem. According to Habitat for Humanity, Residential stability among homeowners is related to improved life satisfaction, along with better physical and mental health. So, according to the experts, owning a home can improve your psychological wellness by making you feel happier and more accomplished.You Can Engage in Your Neighborhood and Grow Your Sense of CommunityYour home connects you to your community. Homeowners tend to stay in their homes longer than renters, and that can help you feel more connected to your community because you have more time to build meaningful relationships. When people stay in the same area for a longer period of time, it can lead to them being more involved: Homeowners also tend to be more active in their local communities.After all, it makes sense that someone would want to help improve the area they’re going to be living in for a while.You Can Customize and Improve Your Living SpaceYour home is a place that’s all yours. When you own it, unless there are specific homeowner’s association requirements, you’re free to customize it however you see fit. Whether that’s small home improvements or full-on renovations, your house can be exactly what you want and need it to be. As your tastes and lifestyle change, so can your home. One major benefit of homeownership is the knowledge that you own your little corner of the world. You can customize your house, remodel, paint, and decorate without the need to get permission from a landlord.Renting can limit your ability to personalize your living space, and even if you do make changes, you may have to undo them before your lease ends. The ability homeownership gives you to customize and improve where you live creates a greater sense of ownership, pride, and connection with your home.Owning your home can change your life in a way that gives you greater satisfaction and happiness. Let’s connect today if you’re ready to explore homeownership and all it has to offer.  

    Read More
  • To-Do List Before Moving In

    To-Do List Before Moving In,Kenneth Jamaca

    Moving into a new home is an exciting time, but before you start unpacking boxes and settling in, there are a few important tasks you should complete to ensure a smooth transition. Here’s a comprehensive to-do list to help you get your new home ready:1. Change the Locks One of the first things you should do before moving in is change the locks. Even if the previous owners or tenants were trustworthy, you never know who might still have a key. Changing the locks ensures that only you and your family have access to your new home.2. Deep Clean the Entire Home Even if your new home looks clean, it’s a good idea to do a deep clean before moving in. This includes scrubbing floors, washing windows, cleaning carpets, and sanitizing bathrooms and kitchens. A thorough clean will make your home feel fresh and ready for you to settle in.3. Check and Set Up Utilities Make sure all utilities—electricity, water, gas, and internet—are set up and functioning properly before you move in. Contact the relevant service providers to transfer or start new accounts in your name, and schedule any necessary appointments for installation.4. Inspect and Make Necessary Repairs Before you move in, do a walkthrough of your new home to inspect for any needed repairs. Look for leaks, electrical issues, or anything that might need fixing. Addressing these problems before moving in will save you time and hassle later.5. Plan Your Furniture Layout Take some time to plan where your furniture will go before moving day. Measure rooms and doorways to ensure everything will fit, and create a layout that makes the most of your space. This will help the moving process go more smoothly and reduce the stress of rearranging furniture later.6. Update Your Address Don’t forget to update your address with important institutions like banks, the post office, your employer, and any subscriptions you have. This ensures that your mail and packages will arrive at your new home without any issues.7. Set Up Home Security If your new home doesn’t already have a security system, consider installing one before moving in. This could include alarms, cameras, or smart home devices. Having a security system in place will give you peace of mind as you settle into your new surroundings.8. Test Smoke and Carbon Monoxide Detectors Safety should always be a priority. Test all smoke and carbon monoxide detectors in your new home to make sure they’re functioning properly. If they’re outdated or not working, replace them immediately.9. Childproof or Pet-proof Your Home If you have young children or pets, take steps to childproof or pet-proof your home before moving in. This might include securing cabinets, covering electrical outlets, and removing any hazardous items from low shelves.10. Introduce Yourself to the Neighbors Finally, take some time to introduce yourself to your new neighbors. Building a good relationship with those around you can make your new community feel more welcoming and can be helpful in case of emergencies or if you need any local advice.By following this to-do list, you’ll ensure that your new home is ready for you and your family. Taking care of these tasks before moving in will make the transition smoother and allow you to enjoy your new space from day one.  

    Read More
  • Selling Your Home After a Renovation

    Selling Your Home After a Renovation,Kenneth Jamaca

    Selling your home after a major renovation can be an exciting yet challenging process. While the improvements you've made can significantly increase the value of your home, it’s important to approach the sale strategically to ensure you get the best possible return on your investment. Here’s how to sell your home after a major renovation. 1. Highlight the Renovations: One of the key selling points of your home will be the renovations you’ve completed. Make sure to highlight these improvements in your listing, marketing materials, and during showings. Provide potential buyers with details about the renovations, including the materials used, the professionals involved, and any warranties or guarantees. 2. Set the Right Price: Pricing your home correctly is crucial, especially after a renovation. While you may be tempted to set a high price to recoup your investment, it’s important to consider the market conditions and comparable home sales in your area. Consult with a real estate agent who has experience with renovated properties to determine a competitive and realistic price. 3. Stage Your Home: Even with recent renovations, staging your home can help potential buyers envision themselves living there. Consider hiring a professional stager who can highlight the new features and create a welcoming atmosphere. If you’re staging the home yourself, focus on decluttering, arranging furniture to maximize space, and adding finishing touches like fresh flowers or artwork. 4. Market Your Home Effectively: A strong marketing strategy is essential for selling a renovated home. Work with your real estate agent to create a comprehensive marketing plan that includes high-quality photos, virtual tours, and detailed descriptions of the renovations. Utilize online listings, social media, and open houses to reach a wide audience. 5. Provide Documentation: Buyers will want to know the details of the renovations, so be prepared to provide documentation. This includes permits, contractor agreements, receipts, and any warranties. Having this information readily available can build buyer confidence and expedite the sales process. 6. Emphasize Energy Efficiency: If your renovations included energy-efficient upgrades, such as new windows, insulation, or HVAC systems, make sure to emphasize these features. Energy efficiency is a major selling point for many buyers, as it can lead to lower utility bills and a reduced environmental impact. 7. Be Prepared for Inspections: Even with recent renovations, buyers will likely request a home inspection. Be prepared for this by addressing any potential issues before listing your home. This could include finishing any minor repairs, ensuring all work meets code requirements, and having your home professionally inspected prior to listing. 8. Highlight the Neighborhood: In addition to the renovations, don’t forget to highlight the benefits of the neighborhood. Whether it’s a great school district, proximity to parks, or a vibrant community, make sure potential buyers know why your home’s location is desirable. 9. Be Flexible with Showings: Flexibility with showings can make a big difference in how quickly your home sells. Accommodate potential buyers by offering a range of viewing times, including evenings and weekends. This will ensure that more people have the opportunity to see your renovated home. 10. Work with a Skilled Real Estate Agent: Selling a home after a major renovation requires a strategic approach, so it’s important to work with a real estate agent who has experience in this area. A skilled agent can help you navigate pricing, marketing, negotiations, and closing to ensure a successful sale. Selling your home after a major renovation can be a rewarding experience when approached with the right strategy. By highlighting the renovations, pricing your home correctly, and working with a skilled real estate agent, you can maximize your return on investment and achieve a successful sale.  

    Read More
  • Smart Solutions for Small Bathroom Remodeling

    Smart Solutions for Small Bathroom Remodeling,Kenneth Jamaca

    Remodeling a small bathroom can be a challenging yet rewarding project. With the right approach, you can maximize space, improve functionality, and create a stylish, comfortable bathroom. Here are some tips to help you remodel a small bathroom effectively.1. Plan the Layout CarefullyA well-thought-out layout is crucial in a small bathroom. Consider the placement of fixtures like the toilet, sink, and shower to ensure there’s enough space for movement. Utilize vertical space for storage solutions to keep the floor area clear.2. Choose the Right FixturesOpt for compact, space-saving fixtures. Wall-mounted sinks, toilets, and cabinets can free up floor space and create a more open feel. Consider a corner sink or a shower instead of a bathtub to save space.3. Use Light ColorsLight colors can make a small space feel larger and more open. Choose light-colored tiles, paint, and fixtures to create a bright, airy atmosphere. Consider using mirrors to reflect light and give the illusion of more space.4. Maximize StorageEfficient storage solutions are essential in a small bathroom. Use built-in shelves, wall-mounted cabinets, and over-the-toilet storage to maximize space. Consider adding a medicine cabinet with a mirror for additional storage.5. Optimize LightingGood lighting can make a small bathroom feel more spacious. Use a combination of ambient, task, and accent lighting to brighten the space. Consider installing a skylight or additional windows if possible to bring in natural light.6. Choose Multi-Functional ItemsLook for multi-functional fixtures and accessories to save space. For example, a vanity with built-in storage or a showerhead with multiple functions can enhance functionality without taking up extra space.7. Keep It SimpleAvoid overcrowding the bathroom with too many decorations or fixtures. A simple, minimalist design can make the space feel larger and more open. Stick to a few key elements and keep the décor streamlined.8. Consider Pocket DoorsTraditional swinging doors can take up valuable space in a small bathroom. Consider installing a pocket door or a sliding barn door to save space and add a unique design element.9. Use Large TilesLarge tiles can create the illusion of more space by reducing the number of grout lines. Choose large tiles for the floor and walls to create a seamless, spacious look.10. Focus on VentilationProper ventilation is crucial in a small bathroom to prevent mold and mildew. Ensure there’s adequate ventilation by installing an exhaust fan or adding a window. Good ventilation can also help keep the space feeling fresh and clean.11. Personalize the SpaceAdd personal touches to make the bathroom feel like your own. Choose accessories and décor that reflect your style and preferences. Even in a small space, a few carefully selected items can make a big impact.  

    Read More
  • Tips for Low-Maintenance Landscaping

    Tips for Low-Maintenance Landscaping,Kenneth Jamaca

    A low-maintenance garden can bring beauty and tranquility to your outdoor space without demanding too much of your time and effort. By making smart choices in plants, materials, and design, you can enjoy a lush, vibrant garden with minimal upkeep. Here are some tips to help you create a low-maintenance garden.1. Choose the Right PlantsSelect plants that are well-suited to your climate and soil conditions. Native plants are often the best choice as they are adapted to the local environment and require less care. Additionally, consider perennials over annuals since they come back year after year, reducing the need for replanting.2. Group Plants by Water NeedsGrouping plants with similar water needs together can make watering more efficient and reduce the risk of over or under-watering. Use drought-tolerant plants to minimize watering requirements.3. Use MulchApplying mulch to your garden beds helps retain moisture, suppress weeds, and regulate soil temperature. Organic mulches like wood chips or straw also break down over time, adding nutrients to the soil.4. Simplify Your LawnLawns can be high-maintenance, so consider reducing the size of your lawn or replacing it with low-maintenance alternatives like ground covers, gravel, or artificial turf. If you keep a lawn, choose drought-resistant grass varieties and mow at a higher setting to promote deeper root growth.5. Install Drip IrrigationDrip irrigation systems deliver water directly to the roots of plants, reducing water waste and ensuring efficient watering. They are easier to manage than traditional sprinklers and can be set on a timer for convenience.6. Minimize WeedingWeeding can be a time-consuming task. To reduce the need for weeding, use landscape fabric under mulch, plant densely to shade out weeds, and choose ground covers that outcompete weeds.7. Opt for Low-Maintenance HardscapingIncorporate low-maintenance hardscaping elements like stone paths, gravel areas, and raised beds. These features require little upkeep and can add structure and interest to your garden.8. Choose Easy-Care ContainersContainer gardening can be low-maintenance if you choose the right containers. Use self-watering pots or containers with built-in reservoirs to reduce the frequency of watering. Group containers together to create a focal point and make watering easier.9. Automate Garden CareConsider automating some of your garden care tasks. Timed irrigation systems, solar-powered garden lights, and automatic feeders for bird baths can reduce your workload and ensure your garden remains healthy and attractive.10. Regular MaintenanceWhile low-maintenance gardens require less effort, regular maintenance is still important. Spend a little time each week on tasks like deadheading flowers, pruning, and checking for pests to keep your garden in top shape.By implementing these tips, you can create a beautiful, low-maintenance garden that provides enjoyment without overwhelming your schedule.    

    Read More

HAVE QUESTIONS? NEED ADVICE? CONTACT US NOW!